Send coins
1. Via the Decimalchain console.
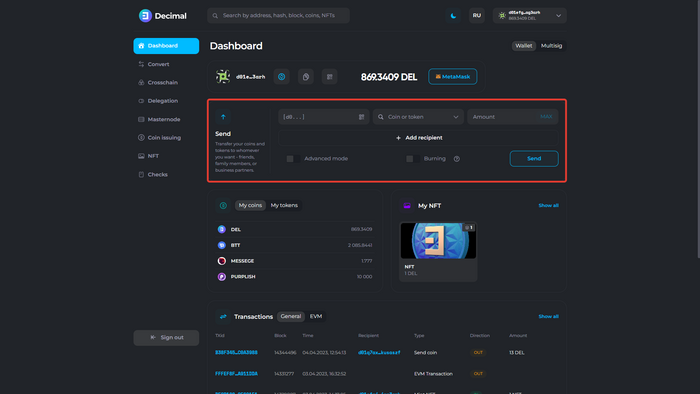
- The coin sending form is available at console.decimalchain.com after entering your seed phrase in the Dashboard under the Send block.
- The coin sending form is available at console.decimalchain.com after entering your seed phrase in the Dashboard under the Send block.

- Detailed analysis of the Send block (Advanced mode):
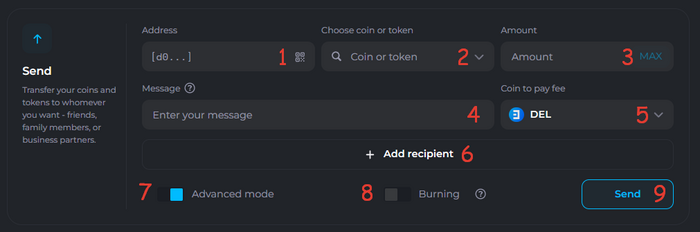
- 1. Recipient wallet address input field. Format [d0…].
- 2. DEL coin or available Decimal blockchain token selection field.
- 3. Coin quantity input field.
- 4. Message field. Allows you to attach a message up to 100 characters long to the transaction, which will be available in the public Decimalchain explorer and saved on the blockchain.
- 5. Coin or token selection field for paying the transaction creation fee.
- 6. Add Recipient button. Allows you to create outgoing transactions to multiple recipient addresses.
- 7. Advanced mode toggle. When enabled, it allows you to add a message to the transaction and select a coin to pay the fee.
- 8. Burning toggle. When enabled, it allows you to send the transaction to a burning address, where coins or tokens will be irretrievably removed from the Decimal blockchain.
- 9. Send button. After filling in the wallet address and the amount of coins to send, the Send button allows you to verify the data, including the fee, and confirm the transaction.
- 1. Recipient wallet address input field. Format [d0…].

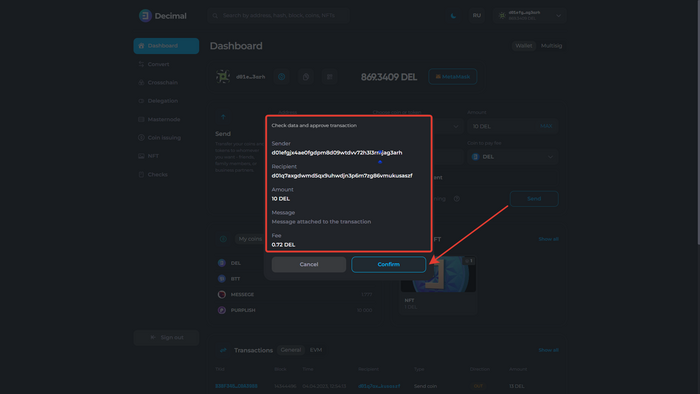
- Click Send, check the data, familiarize yourself with the fee, and confirm the transaction:
- Click Send, check the data, familiarize yourself with the fee, and confirm the transaction:

- Upon successful transaction, you will receive a notification with a clickable link to the transaction Hash (1).
- Upon successful transaction, you will receive a notification with a clickable link to the transaction Hash (1).
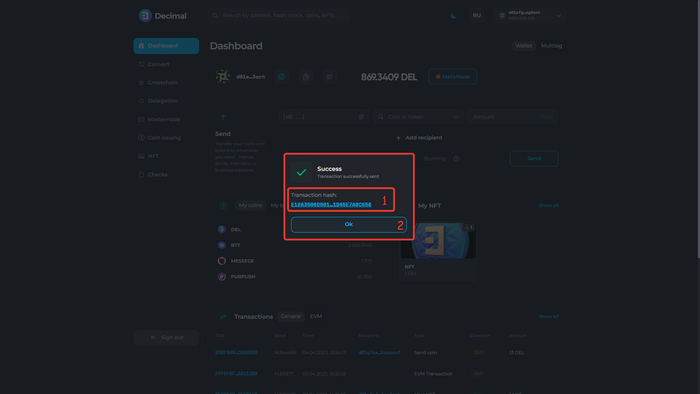

- Click Ok (2).
- Click Ok (2).
The transaction will be displayed in the Transactions block in the Dashboard:

Click on the transaction Hash (TXid) to view transaction details.
