Instruction:Multi-signature
| This is a page with the instruction guide to the Decimal Console. |
A multi-signature crypto wallet, also known as a multisig wallet, means "multiple signatures" in literal terms. It is a special wallet that requires the use of multiple signatures from the owners to operate. Each owner has a unique private key without which no operation can be carried out.
To create a Multi-Signature wallet, go to console.decimalchain.com and select the Multisig tab (2) in the Dashboard (1).
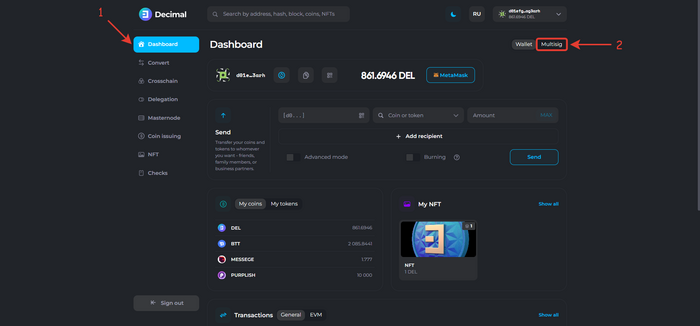
On this page, you can create a multi-signature wallet. The minimum number of owners of the multisig wallet is 2 users. To create a multisig wallet, fill in the following fields (Advanced mode (12) is used):
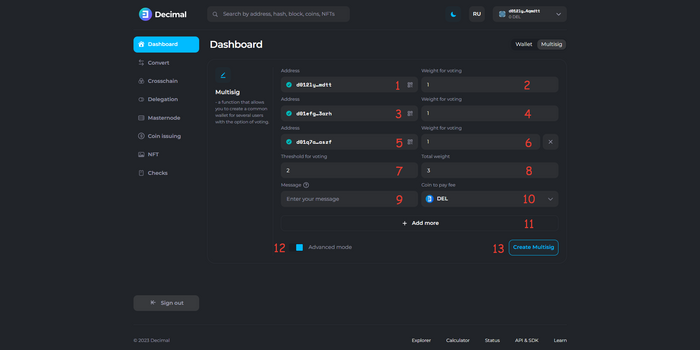
- 1. Your wallet address, which is automatically filled.
- 2. Weight for voting. Determine the voting weight for your wallet.
- 3. The address of the second owner of the multisig wallet.
- 4. Weight for voting. Determine the voting weight for the second owner of the multisig wallet.
- 5. The address of the third owner of the multisig wallet.
- 6. Weight for voting. Determine the voting weight for the third owner of the multisig wallet.
- 7. Threshold for voting. This value takes into account the voting weight of each owner of the multisig wallet. When the sum of the voting weight is equal to or greater than the voting threshold, the smart contract is triggered and the transaction is completed.
- In this example, three owners of the multisig wallet have been created with a weight of 1 vote for each user. The threshold is set to 2 votes. This means that it is sufficient for two (out of three) owners to confirm the transaction for the operation to be signed. The third user may not confirm the transaction.
- 8. Total weight. It is automatically filled, sums the weight of each owner, and indicates the total weight of all the votes you have specified in the Voting weight fields.
- 9. Message (optional). You can leave a comment about the created multisig wallet. This message will be displayed publicly in the blockchain explorer.
- 10. Coin to pay fee. Choose the coin that will be used to pay the fee for creating the multisig wallet.
- 11. + Add more. The minimum number of owners to create a multisig wallet is 2 users. The maximum number of owners is not limited.
- 12. Advanced mode switch.
After filling in the required fields (the address of the second owner, the voting weight of each owner, and the voting threshold), click Create multisig (13).
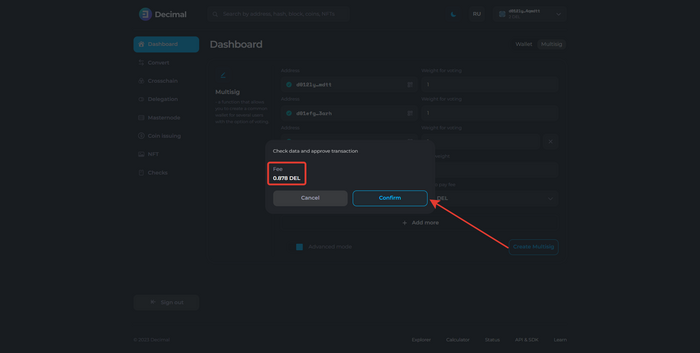
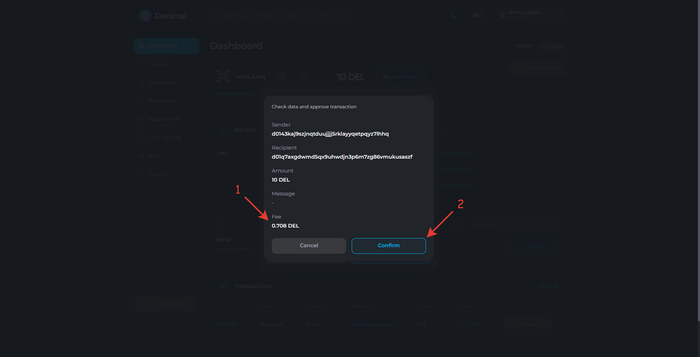
Check the fee and click Confirm.
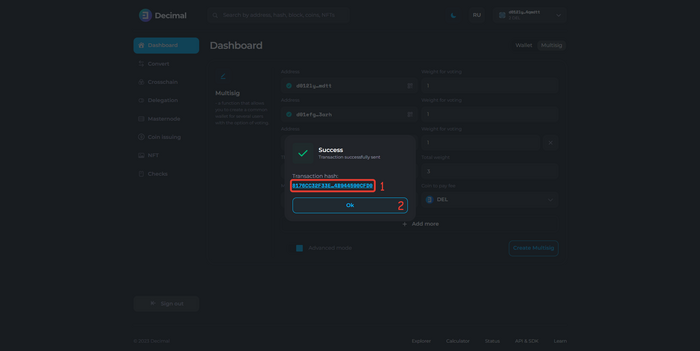
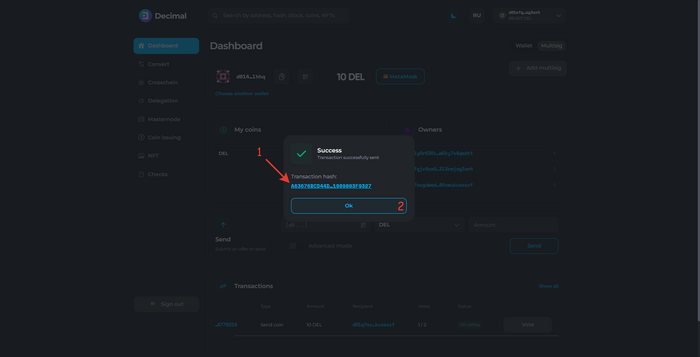
Upon successful creation of the multisig wallet transaction, you will see a corresponding notification. The Transaction Hash (1) is available to you, which indicates all the information about the multisig wallet. Click OK (2).
You have created a multisig wallet.
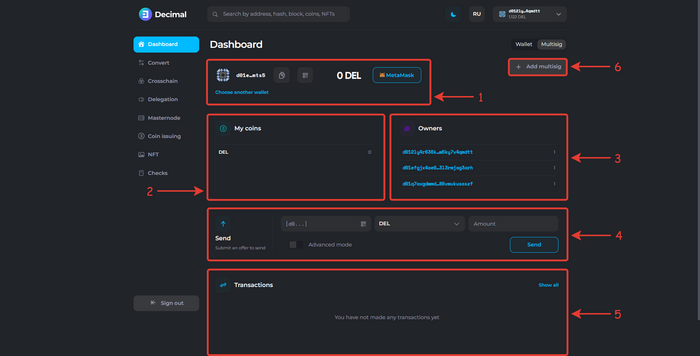
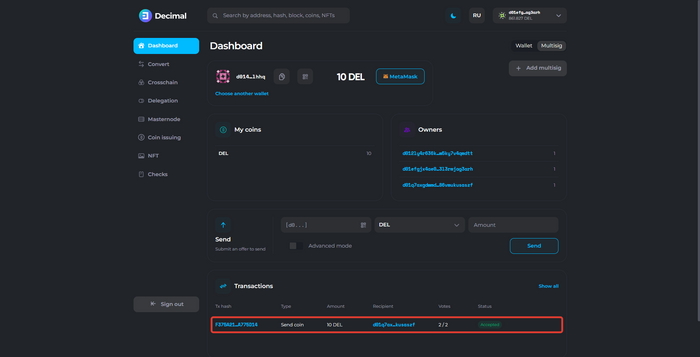
1. Block with multisig wallet address.

- 1. Multisig wallet address;
- 2. Copy multisig wallet address button;
- 3. Create QR-code button for scanning the multisig wallet address;
- 4. Multisig wallet balance;
- 5. Link to Metamask for quick access to the Metamask wallet.
- 6. Button to select another multisig wallet.
2. My coins. Block with the coins that are on the multisig wallet.
3. Owners. Block with the specified addresses of the owners of the multisig wallet and the voting weight for each.
4. Send block. A form for sending coins from the multisig wallet address.
5. Transactions. Block indicating the transaction history for the selected multisig wallet.
6. Add a new multisig wallet button.
Now, if any of the owners of the multisig wallet creates a transaction in the Multisig tab, it will appear in the Transactions block for each owner.
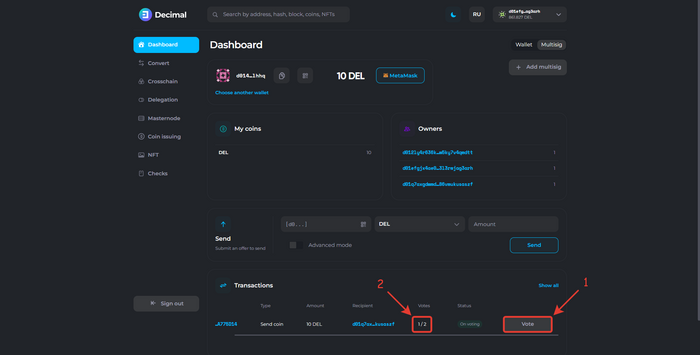
To sign an outgoing transaction, click the Vote button (1).
The Votes column (2) shows the number of votes that have already signed the transaction.
In this example, one owner has already signed the transaction. As soon as the second owner clicks Vote, the transaction will be successfully signed and recorded in the blockchain.
When you click Vote, check the information, select the coin (1) to pay the fee, and enter a message (2) (optional field) that will be publicly displayed in the Decimal blockchain explorer. Click Confirm (3):
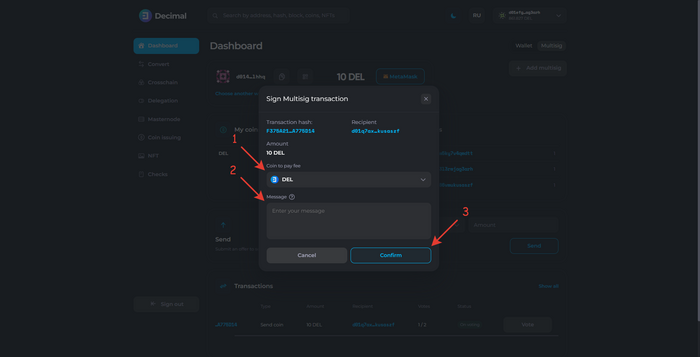
Check the information, review the fee (1) and click Confirm (2):
Upon successful creation of the multisig wallet transaction, you will see a corresponding notification. The Transaction Hash (1) is available to you, which indicates all the information about the multisig wallet. Click OK (2):
A successfully signed multisig wallet transaction will appear in the Transactions block. Status: Accepted:
