Instruction:How to sell NFT at nft.bit.team: Difference between revisions
| [checked revision] | [checked revision] |
No edit summary |
CryptoUser (talk | contribs) No edit summary |
||
| (5 intermediate revisions by 2 users not shown) | |||
| Line 1: | Line 1: | ||
{{#seo: | {{#seo: | ||
|title= | |title= How to sell NFT at nft.bit.team — Instruction on Decimal Wiki | ||
|titlemode= append | |titlemode= append | ||
|keywords= | |keywords= How to sell NFT at nft.bit.team | ||
|description= | |description= How to sell NFT at nft.bit.team | ||
}} | }} | ||
{{old-pics}} | |||
{{manual-console}} | |||
'''{{l|https://nft.bit.team/|NFT.BIT.TEAM}}''' — a marketplace for buying and selling [[NFT]] created on the [[DecimalChain]] [[blockchain]]. | |||
{{!!!}} '''NOTE!''' ''The [[fee]] charged by [https://nft.bit.team/ nft.bit.team] is 20% (10% charged to the seller and 10% to the buyer).'' | |||
== How to sell NFT at nft.bit.team == | |||
1. Go to the marketplace by the link and log in to the system. | |||
[[File:Instructions-snimok_ehkrana_2021-10-12_v_14.02.59.png|700px|thumb|left]]<br clear="all"> | |||
2. Next, select '''NFT Market''' and log in with your username and password as '''''p2p BitTeam'''''. | |||
[[File:Instructions-snimok_ehkrana_2021-10-12_v_14.08.35.png|700px|thumb|left]]<br clear="all"> | |||
If you are not registered on 'p2p BitTeam', register and repeat the first 2 steps. | |||
< | [[File:Instructions-snimok_ehkrana_2021-10-12_v_14.11.15.png|700px|thumb|left]]<br clear="all"> | ||
3. By clicking '''Add NFT''' you will find your address which corresponds to your address at '''''p2p BitTeam'''''. | |||
< | [[File:Instructions-snimok_ehkrana_2021-10-12_v_15.40.27.png|700px|thumb|left]]<br clear="all"> | ||
[[File:Instructions-snimok_ehkrana_2021-10-12_v_15.42.24.png|700px|thumb|left]]<br clear="all"> | |||
4. Copy the address and go to the '''[[Decimal Console|DecimalChain console]]''' in the '''Wallet''' section, select '''your NFT'''. Insert the address of the marketplace and send the token to the marketplace. | |||
[[File:Instructions-snimok_ehkrana_2021-10-12_v_17.34.50.png|700px|thumb|left]]<br clear="all"> | |||
5. Go back to the marketplace and click the user button in the upper right corner and select '''Gallery''' section as in the screenshot below. | |||
[[File:Instructions-snimok_ehkrana_2021-10-12_v_16.46.14.png|700px|thumb|left]]<br clear="all"> | |||
6. The gallery section contains your NFTs. Before you put the NFT for sale, you need to edit it. | |||
[[File:Instructions-snimok_ehkrana_2021-10-12_v_16.47.24.png|700px|thumb|left]]<br clear="all"> | |||
7. Insert all the necessary data in the fields, select a category. If necessary, add a COVER/and | |||
[[File:Instructions-snimok_ehkrana_2021-10-12_v_16.51.20.png|700px|thumb|left]]<br clear="all"> | |||
[[File:Instructions-snimok_ehkrana_2021-10-12_v_16.52.25.png|700px|thumb|left]]<br clear="all"> | |||
[[File:Instructions-snimok_ehkrana_2021-10-12_v_16.53.30.png|700px|thumb|left]]<br clear="all"> | |||
8. After entering and saving all the data, go back to the '''Gallery''' and press the button on '''On'''. | |||
[[File:Instructions-snimok_ehkrana_2021-10-12_v_16.55.56.png|700px|thumb|left]]<br clear="all"> | |||
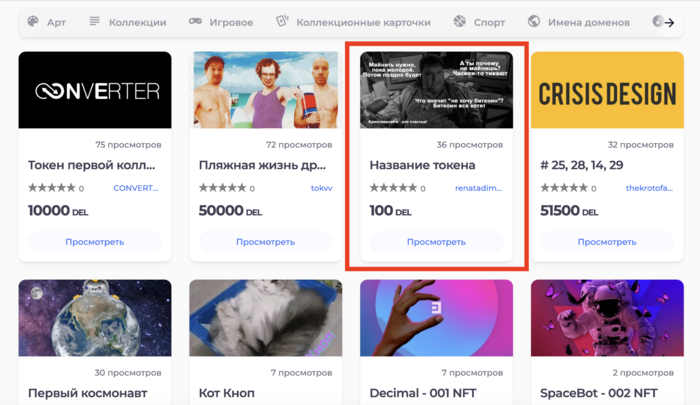
9. Now your NFT is available for viewing and purchase by all users of the marketplace. | |||
[[File:Instructions-snimok_ehkrana_2021-10-12_v_16.56.54.png|700px|thumb|left]]<br clear="all"> | |||
== See also == | |||
* [[Instruction:How to create a public NFT]] | |||
* [[Instruction:How to create an NFT with a custom coin]] | |||
* [[Instruction:How to buy NFT at nft.bit.team]] | |||
[[Category:Instructions:NFT]] | |||
[[Category:Instructions:Crypto trading]] | |||
[[Category:BIT.TEAM]] | |||
{{interwiki|ru=Инструкция:Как купить NFT на nft.bit.team}} | |||
Latest revision as of 16:48, 24 April 2024
| Attention! The illustrations on this page are outdated! The article needs to update the illustrations and bring them up to date. You can help the project by uploading new files and adding them to the article. |
| This is a page with the instruction guide to the Decimal Console. |
NFT.BIT.TEAM — a marketplace for buying and selling NFT created on the DecimalChain blockchain.
![]() NOTE! The fee charged by nft.bit.team is 20% (10% charged to the seller and 10% to the buyer).
NOTE! The fee charged by nft.bit.team is 20% (10% charged to the seller and 10% to the buyer).
How to sell NFT at nft.bit.team
1. Go to the marketplace by the link and log in to the system.
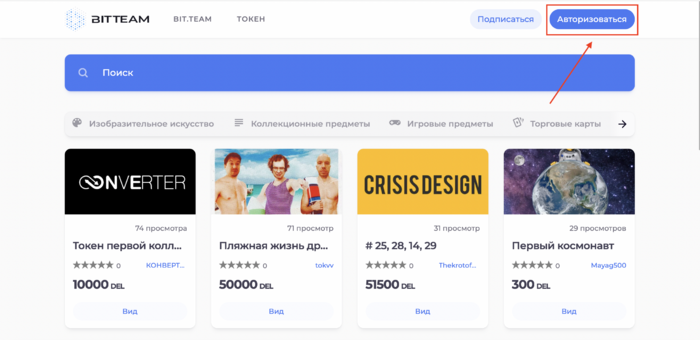
2. Next, select NFT Market and log in with your username and password as p2p BitTeam.
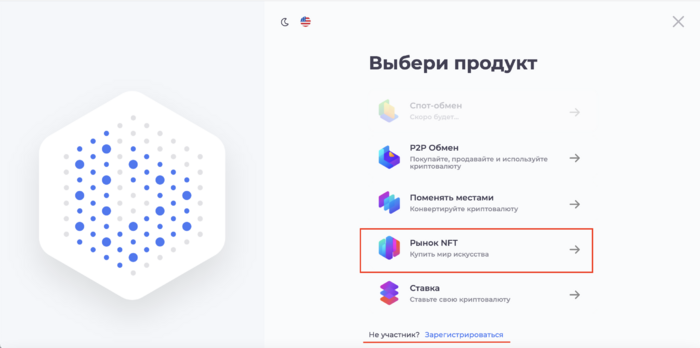
If you are not registered on 'p2p BitTeam', register and repeat the first 2 steps.
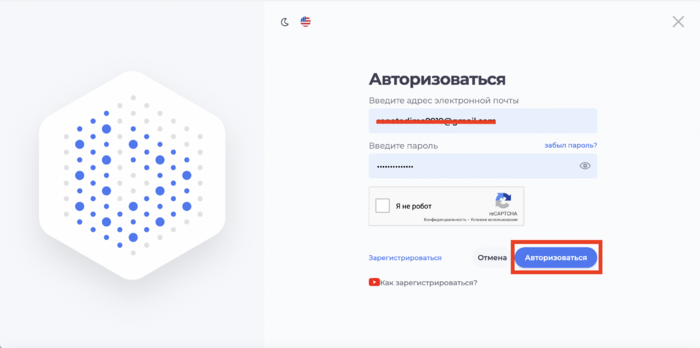
3. By clicking Add NFT you will find your address which corresponds to your address at p2p BitTeam.
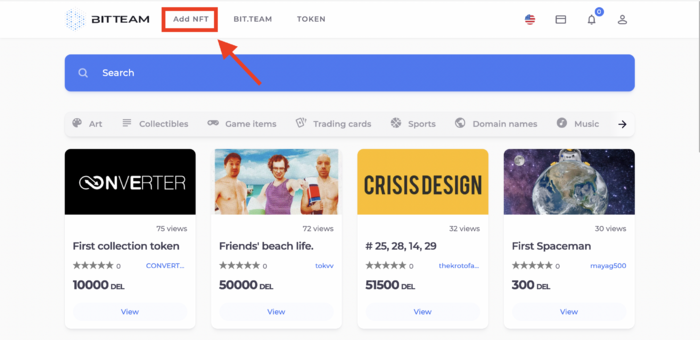
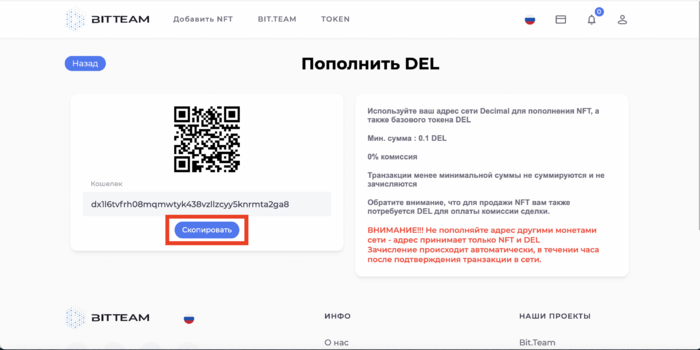
4. Copy the address and go to the DecimalChain console in the Wallet section, select your NFT. Insert the address of the marketplace and send the token to the marketplace.
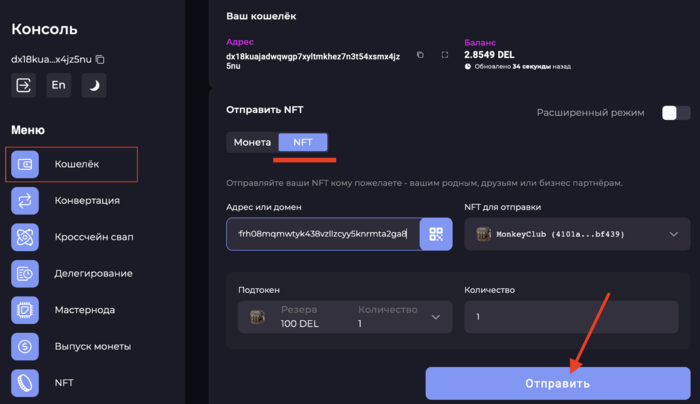
5. Go back to the marketplace and click the user button in the upper right corner and select Gallery section as in the screenshot below.
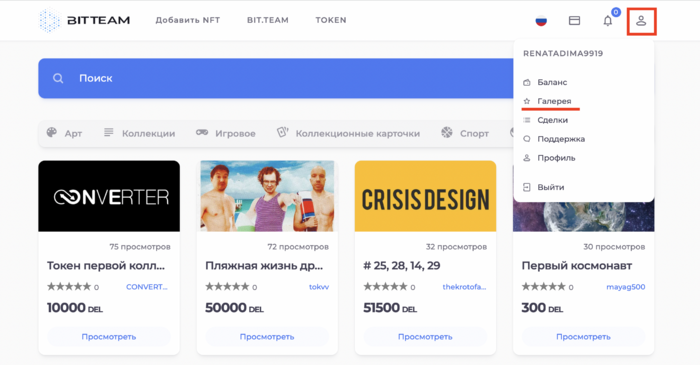
6. The gallery section contains your NFTs. Before you put the NFT for sale, you need to edit it.
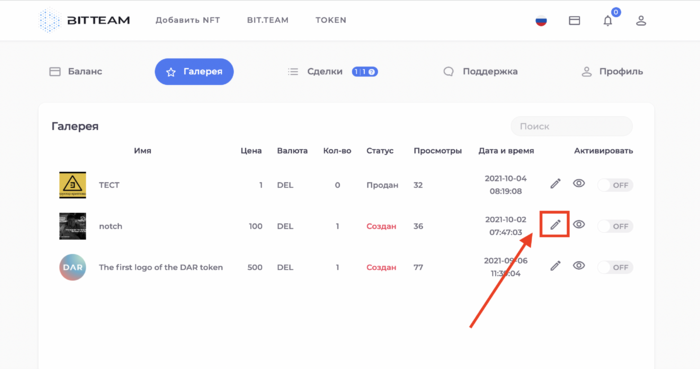
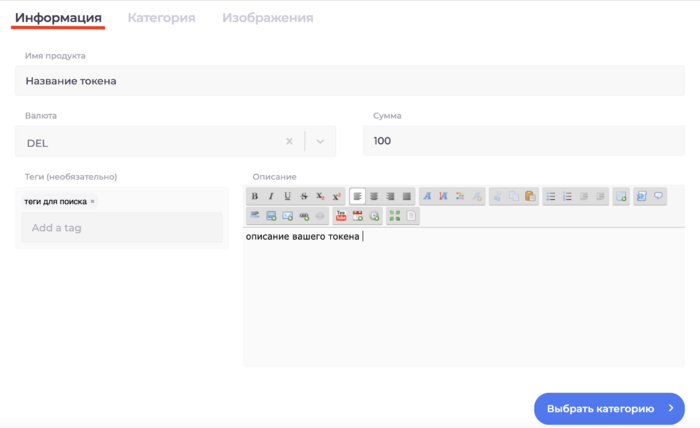
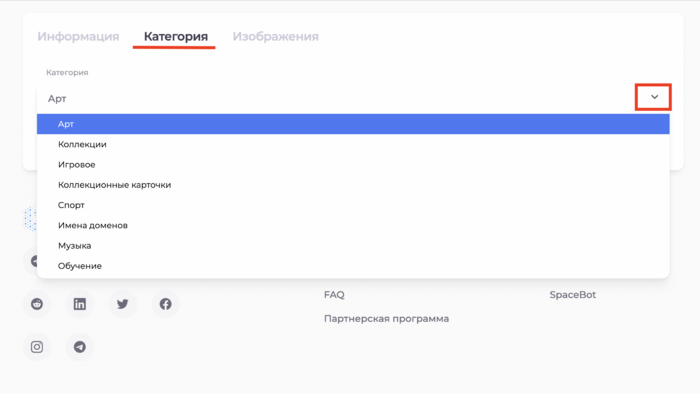
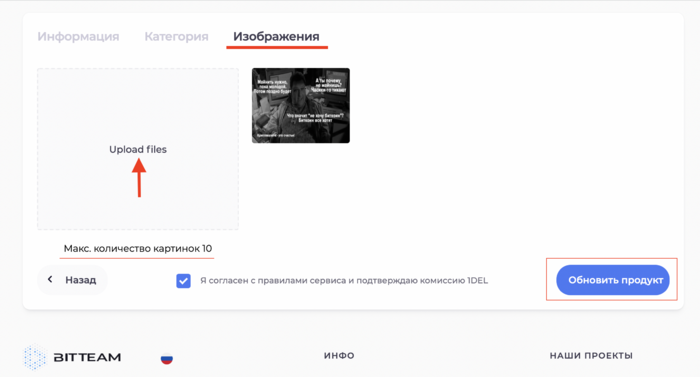
7. Insert all the necessary data in the fields, select a category. If necessary, add a COVER/and
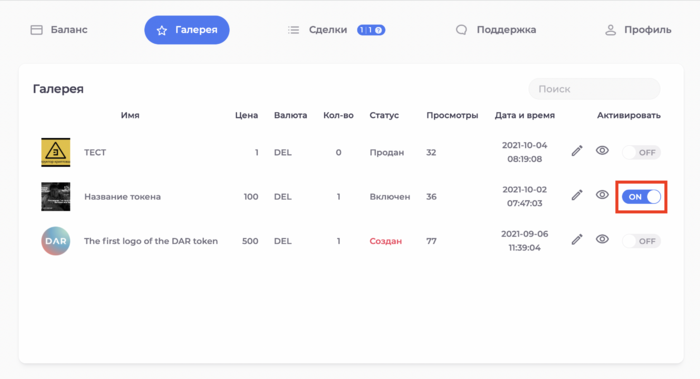
8. After entering and saving all the data, go back to the Gallery and press the button on On.
9. Now your NFT is available for viewing and purchase by all users of the marketplace.
See also
- Instruction:How to create a public NFT
- Instruction:How to create an NFT with a custom coin
- Instruction:How to buy NFT at nft.bit.team